If you love eggs with rich, jammy, custard-like yolks, this recipe is going to be your new weekly ritual. These Spicy Garlic Soy Marinated Soft-Boiled Eggs (inspired by Korean Mayak Gyeran, playfully nicknamed "drug eggs" because of how addictively flavorful they are) are one of the simplest yet most rewarding meal-prep proteins you can keep in your fridge.
I was originally inspired by the recipe in Jennifer Fisher's book Trust Your Gut. I adapted the proportions for my own routine—dialing in the 6-minute boiling time for that perfect molten center, tweaking the aromatics, and identifying the optimal 6-hour marinating window.
Steeping soft-boiled eggs in a savory bath of soy sauce, minced garlic, crisp scallions, toasted sesame seeds, and chili infuses the egg whites with deep umami while keeping the yolks creamy and decadent.
The Science of the 6-Minute Soft-Boiled Egg
Achieving that velvety, custard-like yolk with a fully set tender white comes down to precise thermal timing:
- Egg White Coagulation (60°C–65°C / 140°F–149°F): The egg white (albumen) begins firming up quickly once dropped into rolling boiling water.
- Egg Yolk Coagulation (65°C–70°C / 149°F–158°F): At 6 minutes, the yolk reaches roughly 63°C—warm and pasteurized, but still viscous, molten, and jammy.
- The Ice Bath Arrest: Removing the eggs from boiling water is only half the battle. Without an immediate 5-minute ice shock, latent thermal mass continues cooking the interior into a chalky hard-boiled center.
Why 6 Hours Is the Optimal Marination Time
Through repeated kitchen testing, 6 hours is the undisputed sweet spot for standard soy sauce marinades:
- Osmotic Balance: Soy sauce contains roughly 14–18% salt. Over 6 hours, salt and umami glutamates penetrate through the egg white into the outer layer of the yolk.
- Avoiding Rubbery Whites: If left past 8–10 hours, salt pulls significant moisture out of the egg whites and yolk through osmosis, turning the whites rubbery and shrinking the egg.
- Storage Best Practice: At the 6-hour mark, lift the eggs out of the brine and store them dry in an airtight glass container. They stay fresh, luscious, and creamy for up to 3 days.
How to Enjoy Them
- High-Protein Grab & Go: Eat chilled straight from the fridge with a pinch of flaky salt on the yolk.
- Kimchi & Cauliflower Rice Bowl: Pair two sliced eggs with spicy fermented kimchi and warm cauliflower rice.
- Steak & Broth Topping: Drop into a hot bowl of bone broth or alongside sliced ribeye for a restaurant-style ramen bowl.
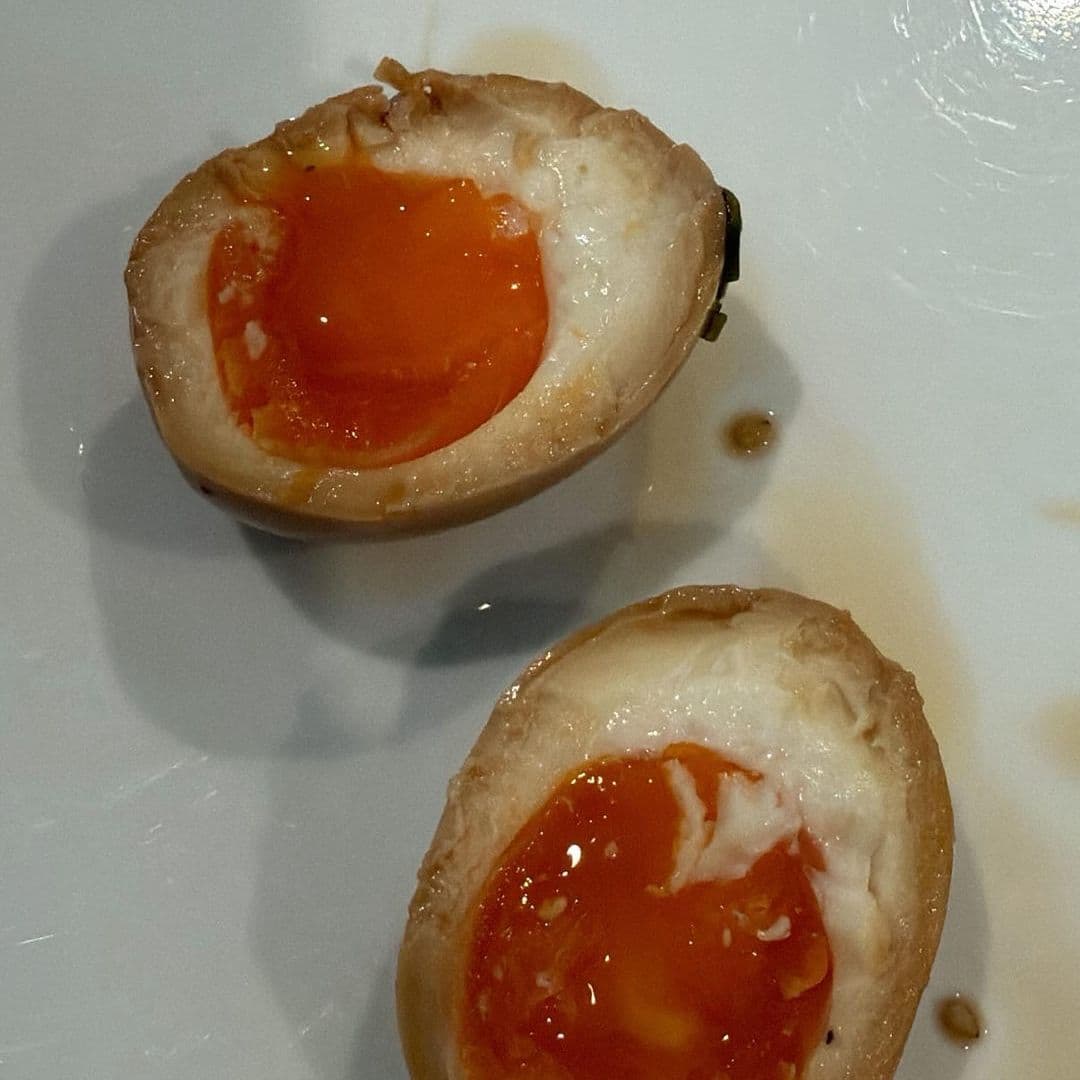
Spicy Garlic Soy Marinated Soft-Boiled Eggs (Mayak Eggs)
Method: Boiled & Marinated·Difficulty: Easy
🥩Ingredients
(9 items)Tap or click any ingredient to check it off as you prep:
- 6 large eggs (cold or room temperature)
- ½ cup water (120 ml)
- ½ cup light soy sauce (120 ml, or tamari / coconut aminos if gluten-free)
- 1 clove garlic, finely minced
- 2 scallions / green onions, thinly sliced
- 1 tsp toasted sesame seeds
- ½ tsp coarse sea salt
- Chili flakes or chopped fresh red chili, to taste (optional)
- Pinch of flaky sea salt (for finishing yolks)
🍳Recommended Equipment
May contain affiliate links🔥Step-by-Step Instructions
6 StepsBoil Eggs to Jammy Perfection (6 Minutes)
Ice Shock and Peel
Whisk Garlic-Soy Marinade
Submerge the Peeled Eggs
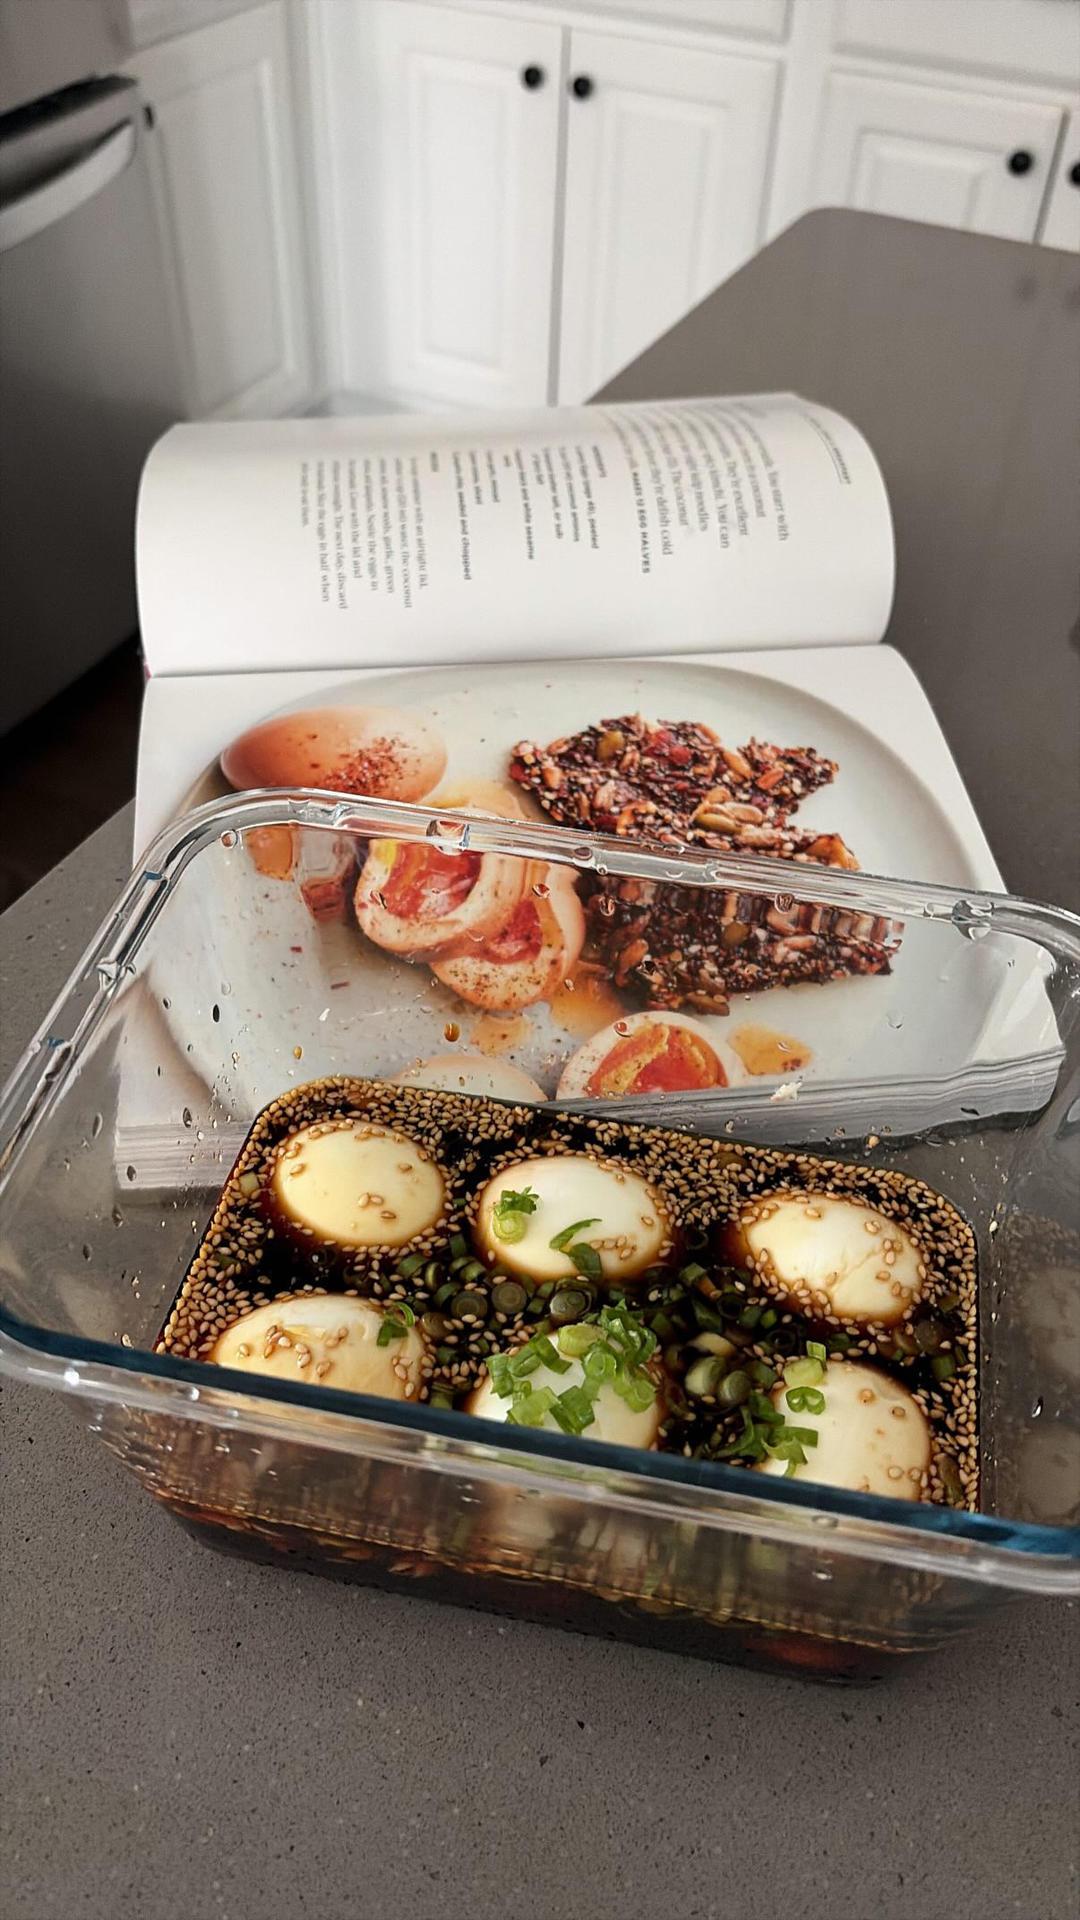
Chill & Marinate (6 Hours)
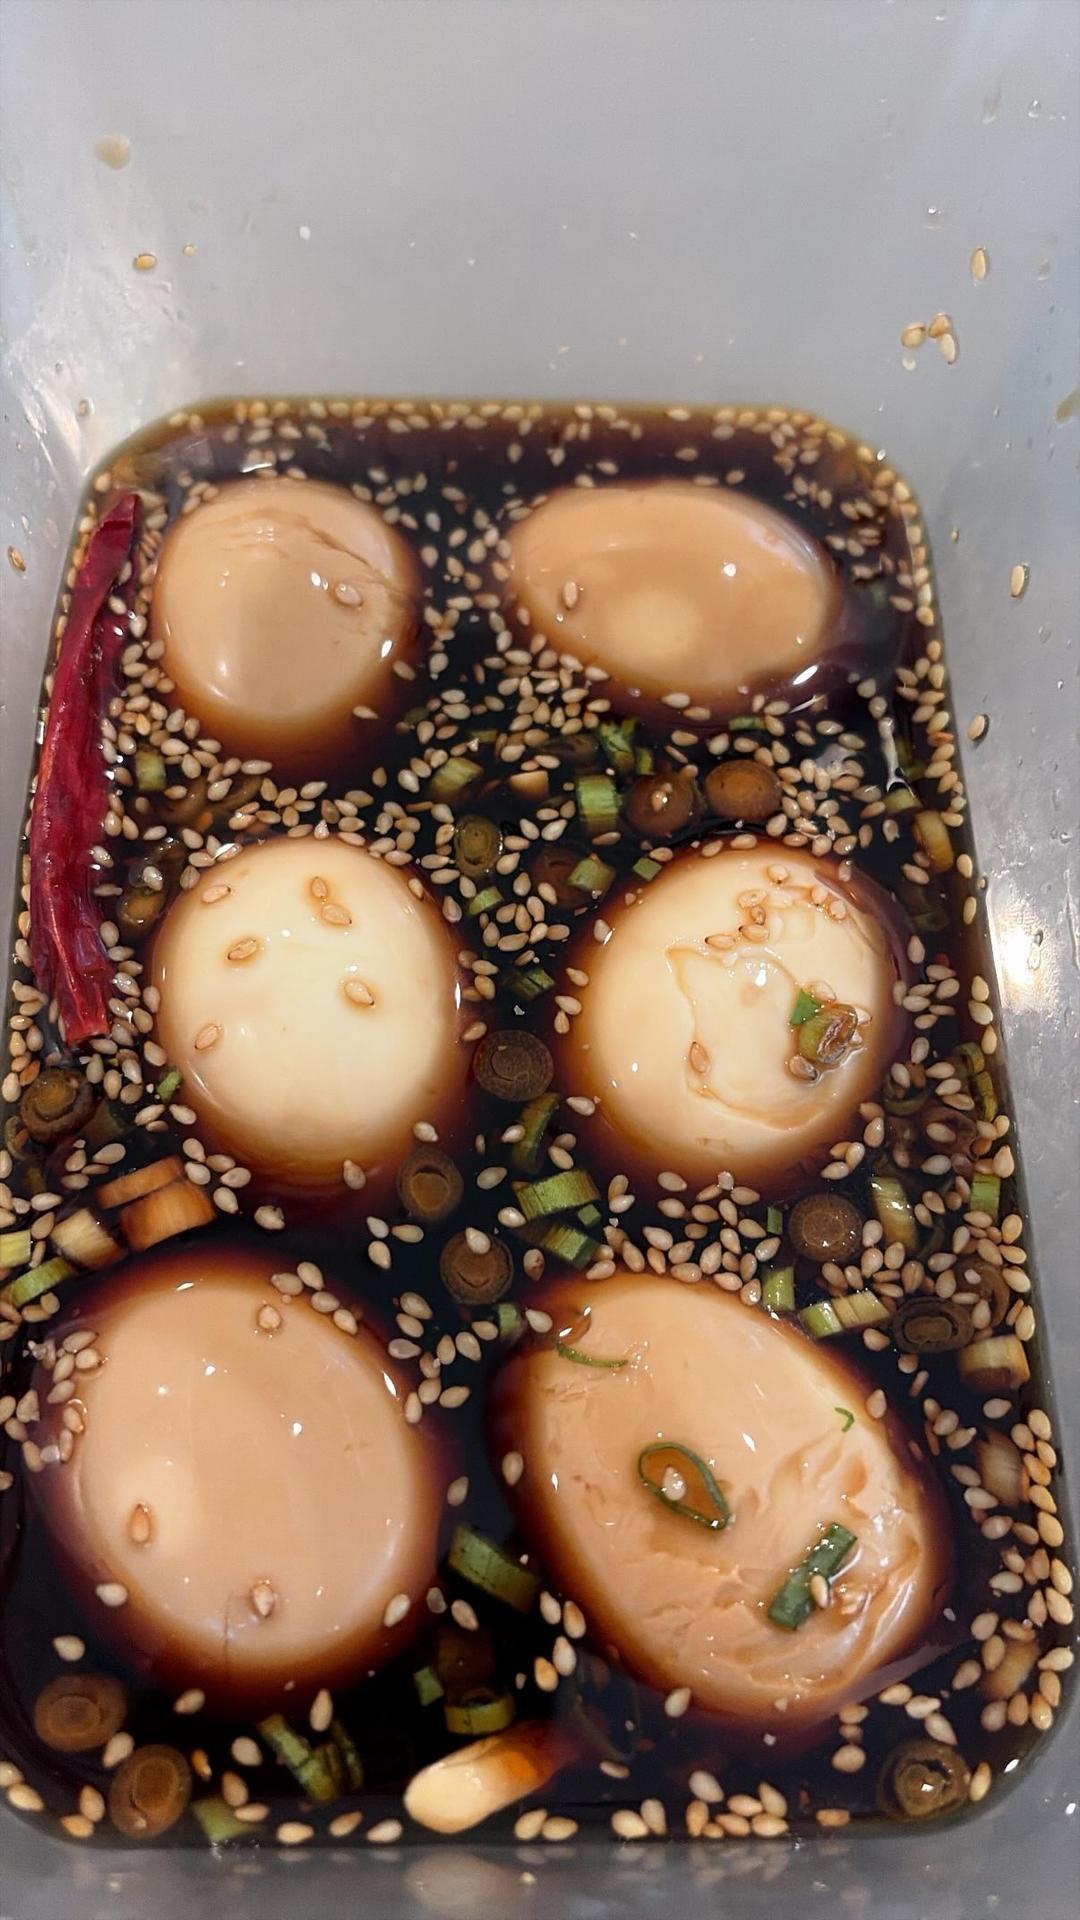
Slice, Season & Enjoy
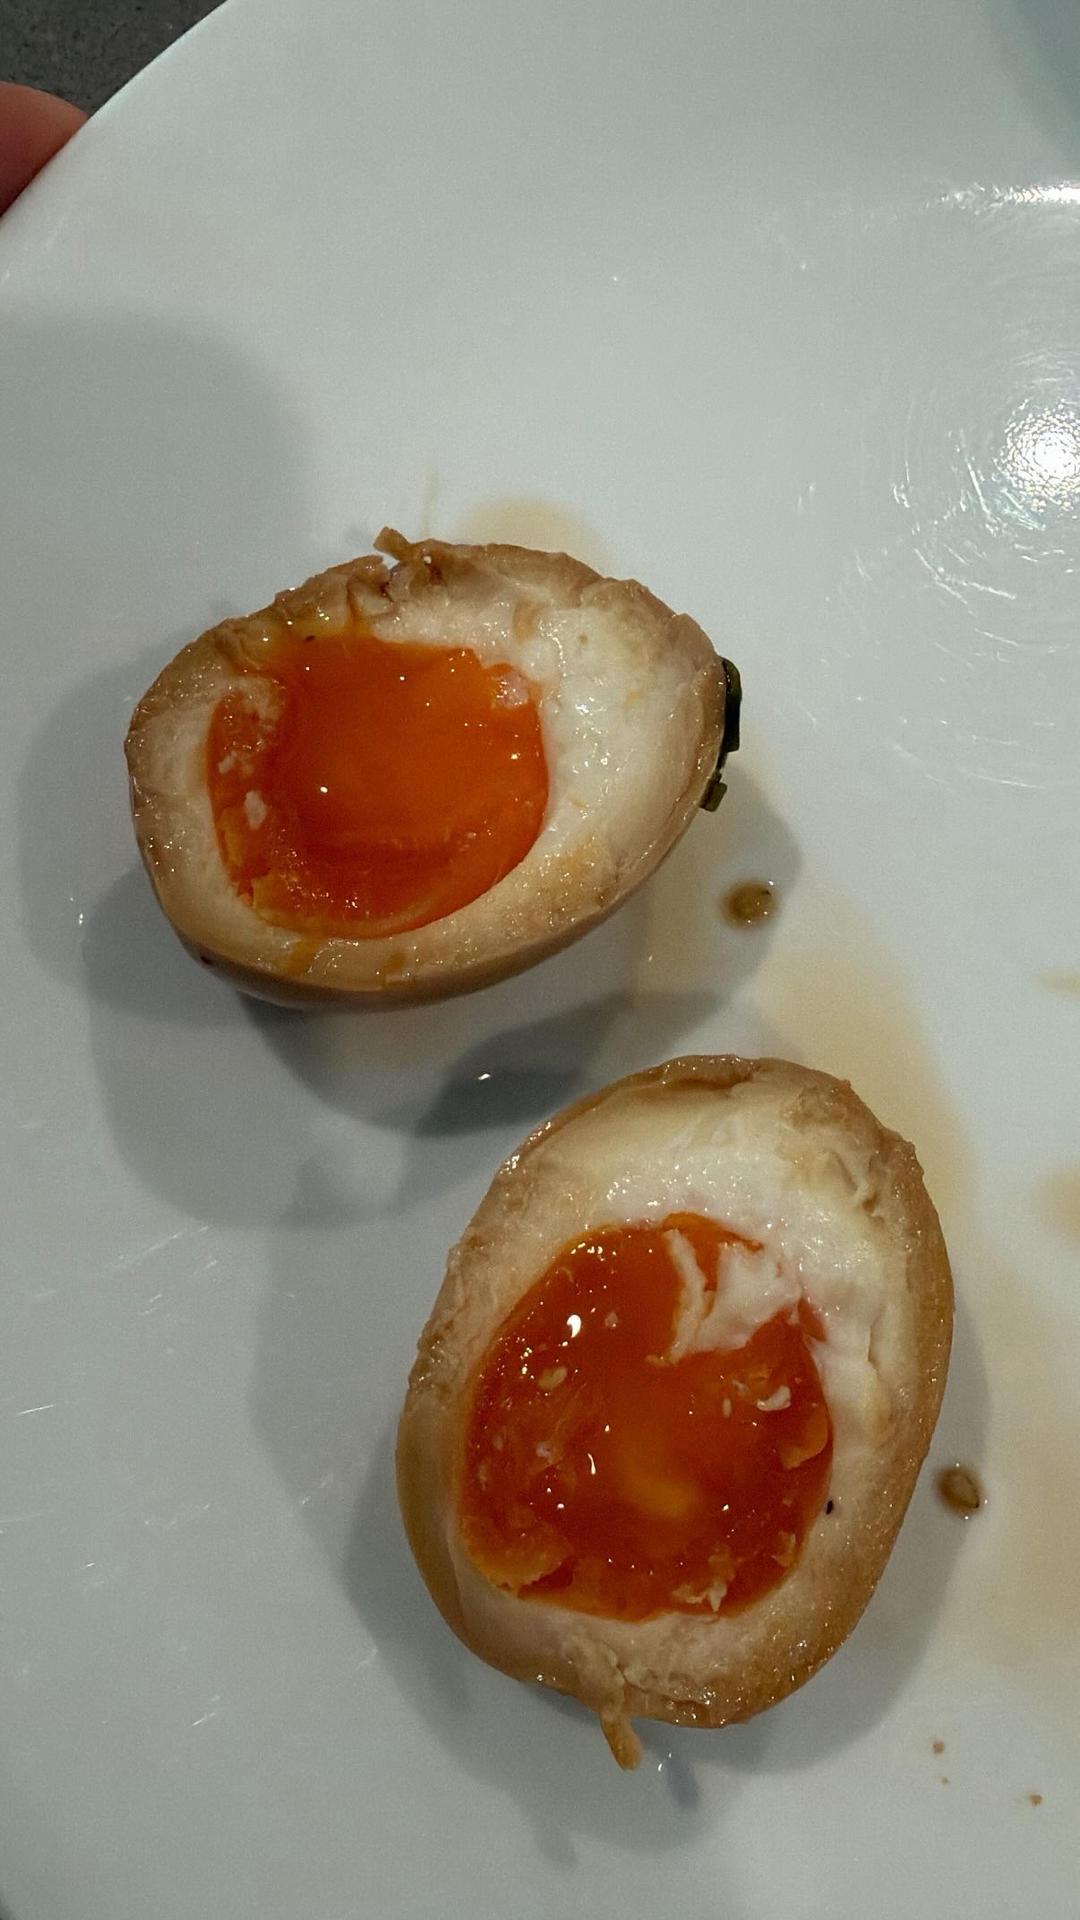
✨Chef's Success Tips
- •The 6-Hour Golden Window: 6 hours is the sweet spot for light soy sauce. If you prefer a lighter marinade or need to store them in liquid longer, dilute the soy sauce with an extra ¼ cup of water.
- •Storage: Store finished eggs out of the liquid in an airtight container in the fridge for up to 3 days.
- •Cookbook Inspiration: Adapted from Jennifer Fisher’s *Trust Your Gut*.
Ready to start cooking?
Open hands-free Cooking Mode with screen wake lock and big touch controls.

Mira (美良)
🥩 Carnivore & Gut HealthHi, I’m Mira! I healed debilitating autoimmune conditions and severe gut issues through a meat-based carnivore diet. I write about practical zero-carb meal prep, real-world healing milestones, and delicious animal-based recipes to help you regain your vitality.